How to Automatically Save Gmail Attachments to Google Drive and Log Them in Google Sheets with Zapier
This workflow watches Gmail for a new attachment, converts the email date to YYYY-MM-DD, saves the file to Google Drive with the date added to the filename, and writes a searchable record to Google Sheets.
test.pdf → 2026-08-19_test.pdf, with the received date, sender, subject, saved filename, and Google Drive link recorded in Google Sheets.
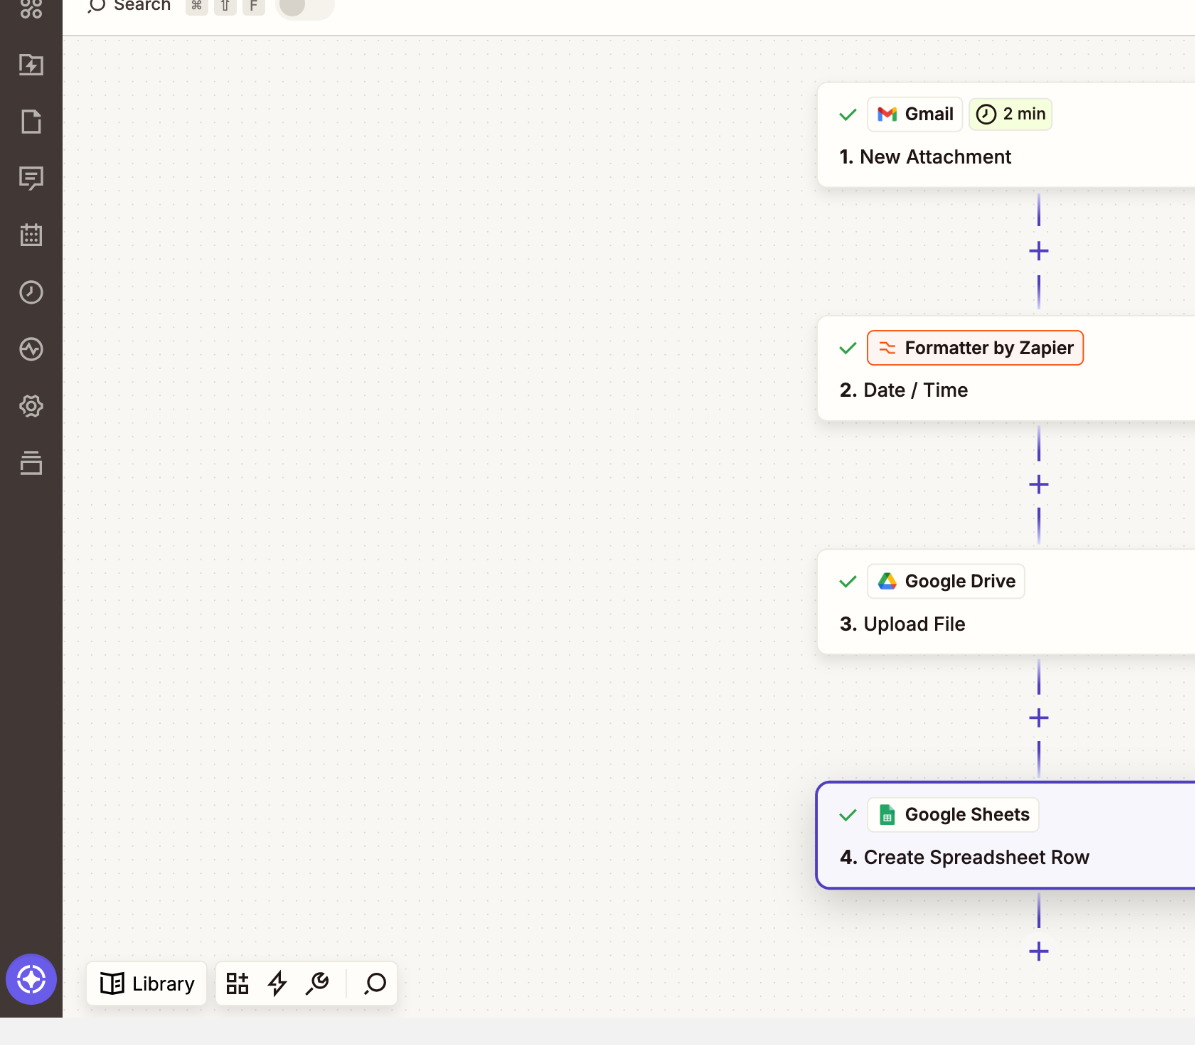
What this automation does
Watch Gmail for a new attachment. 2. Rename
Convert the received date to
YYYY-MM-DD and prepend it to the filename.
3. ArchiveSave the file to Drive and log the details in Sheets.
Before you start
You need a Gmail account, Google Drive, Google Sheets, and a Zapier account. In our test, Zapier was running under a Pro trial while the multi-step workflow was built.
For privacy, use test files and non-sensitive email content while building and testing the Zap. The screenshots in this guide have personal address details removed where necessary.
Step 1 — Use Gmail “New Attachment” as the trigger
- Create a new Zap and choose Gmail as the trigger app.
- Select New Attachment as the trigger event.
- Connect the Gmail account you want Zapier to watch.
- Leave the mailbox broad for the first test, then run Test trigger and choose a real test attachment.
For our test record, Gmail returned the original attachment filename test.pdf, the message subject invoice, the sender information, and the email date.
Step 2 — Convert the received date to YYYY-MM-DD
Add Formatter by Zapier and choose Date / Time → Format. Map the Gmail message date into the Input field, then set the output format to YYYY-MM-DD. We used Asia/Tokyo as the output timezone.
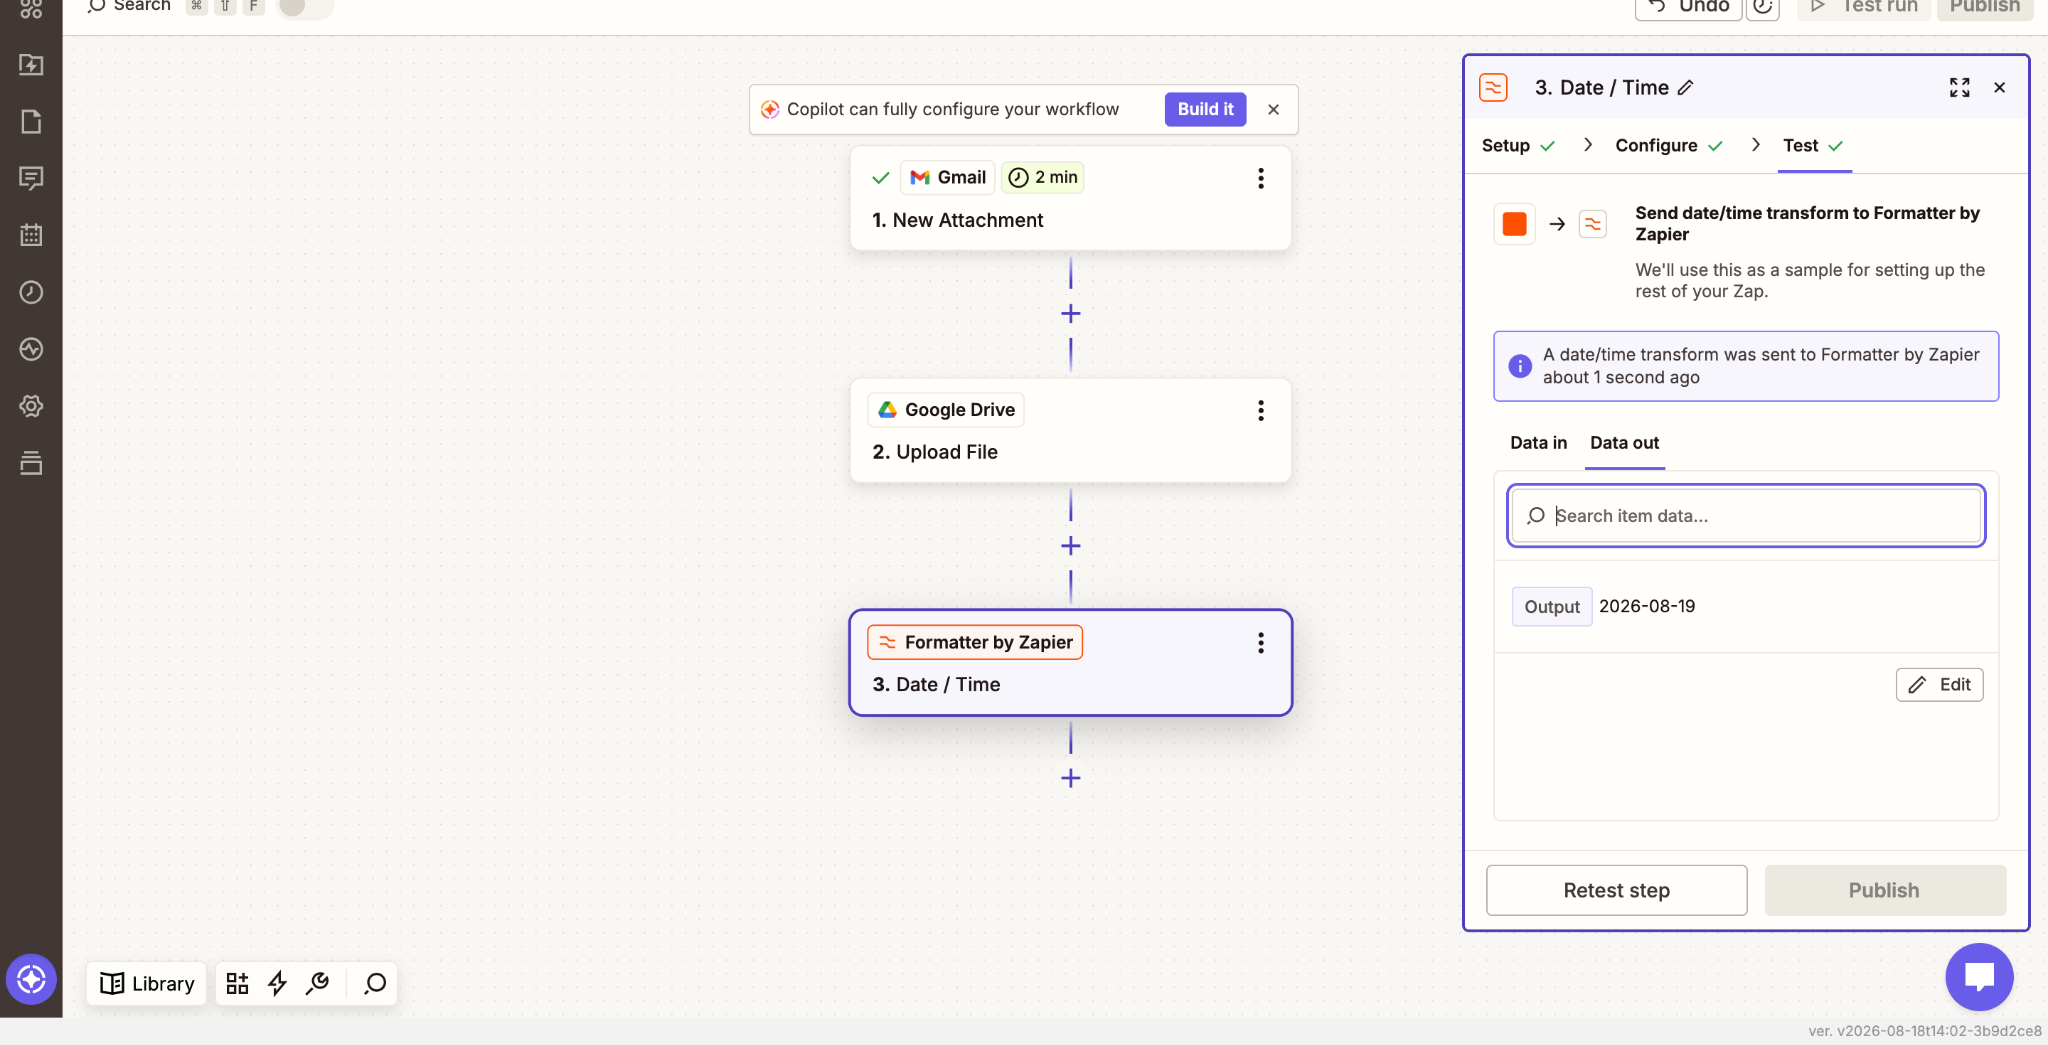
2026-08-19 from the Gmail message date.Step 3 — Upload the attachment to Google Drive with a dated filename
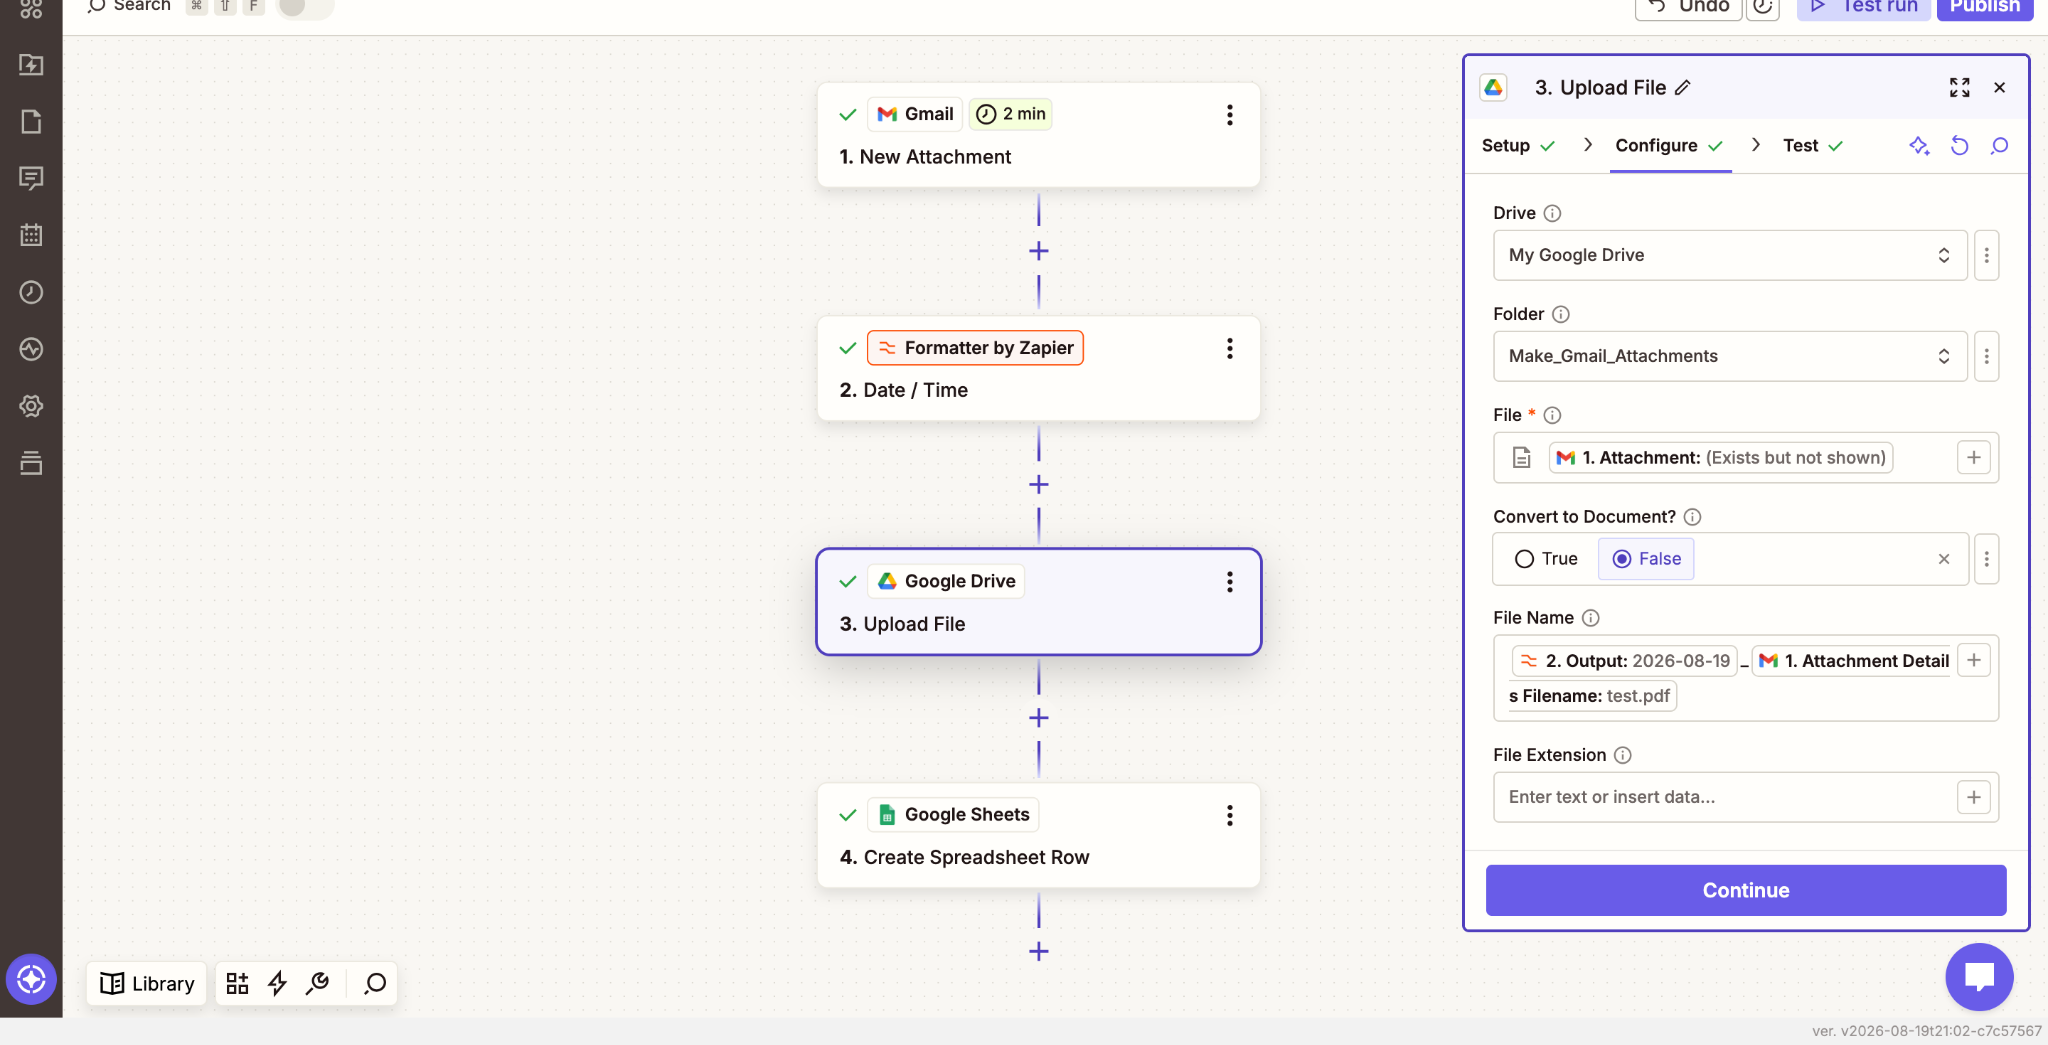
Add Google Drive → Upload File. Map the Gmail attachment itself into the File field and choose the destination folder.
For File Name, combine the Formatter output, an underscore, and Gmail’s original attachment filename:
[Formatter Output]_[Attachment Details Filename]
With our test data, that becomes 2026-08-19_test.pdf.
Step 4 — Create a Google Sheets log
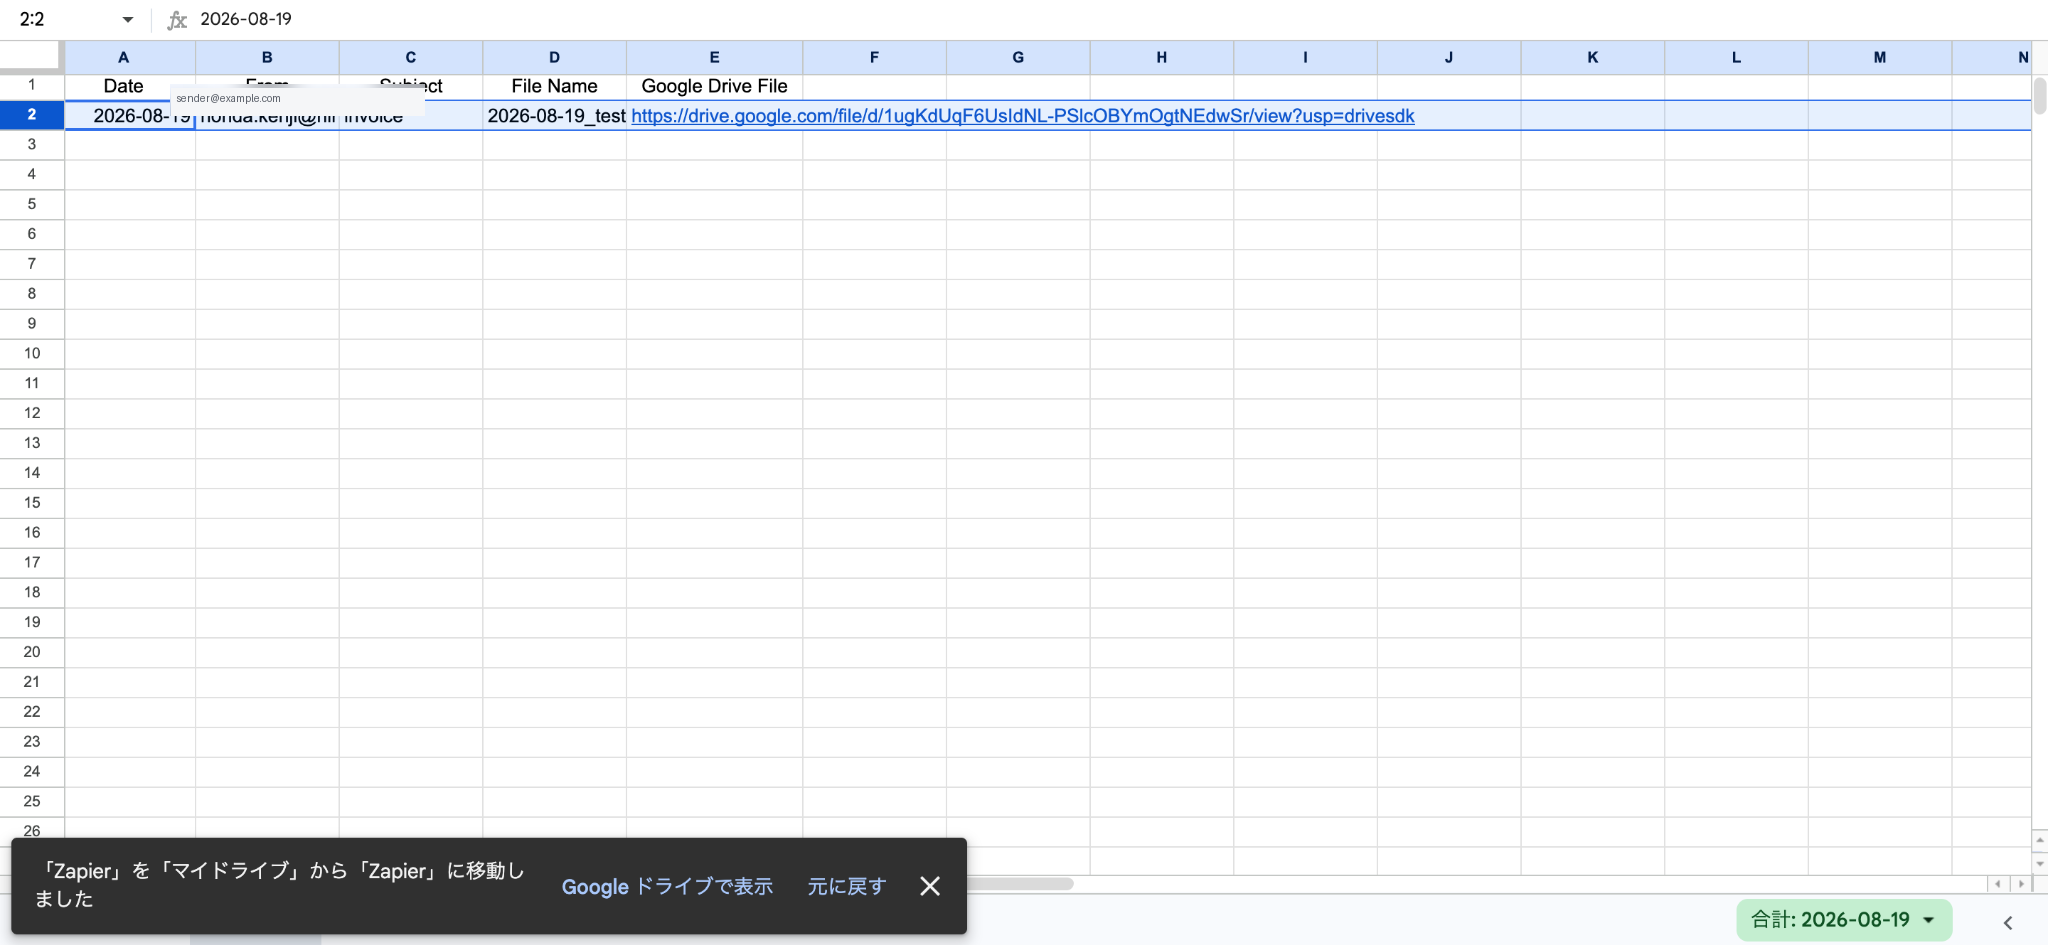
Create a spreadsheet with these headers in row 1:
Formatted date from Step 2
Gmail sender email
Gmail subject
The final dated filename
The Drive alternate/view link
Then add Google Sheets → Create Spreadsheet Row and map each column. If Zapier still shows old column names after you edit the sheet header, refresh the worksheet field list or reselect the worksheet.
The finished result
After testing the full workflow, the original attachment test.pdf was saved with a date-first naming convention and the Google Sheets log contained the corresponding Drive link.
test.pdf → 2026-08-19_test.pdf
Common problems we hit while building it
Google Sheets still shows an old column name
Zapier can cache the previous worksheet structure. Refresh the worksheet list or reselect the worksheet after editing row 1.
The file saves as the original name
The Formatter step must appear before the Google Drive upload step if you want to use the formatted date in the Drive filename.
The date is in the wrong timezone
Set the Formatter output timezone explicitly. This matters for messages received near midnight.
The Google Sheets row contains the old filename
Build the Sheet’s File Name field using the same combination used in the Drive step: Formatter output + underscore + original attachment filename.
Zapier or Make for this workflow?
Zapier made the basic Gmail-to-Drive flow straightforward, but the workflow became more step-heavy once we added date formatting and a Sheets audit log. We also built similar Gmail attachment workflows in Make, which uses a more visual branching model.
Want to compare another approach?
See our hands-on Make guide for Gmail attachment automation, or try Make directly if you prefer visual workflow building.
Affiliate disclosure: the Make link is an affiliate link. We may earn a commission if you later become a paying customer, at no additional cost to you.
Bottom line
If your goal is simply to archive Gmail attachments, Zapier can get you there quickly. If you also want consistent filenames and a lightweight audit trail, adding Formatter and Google Sheets turns it into a much more useful operational workflow.